Sunday, November 21, 2010

How to make a simple Network Indicator in flashlite 1.1

Hit Counter Hit Counter

Hello people today we'll learn to make a flashlite Network Indicator using flash professional 8. This is a 15 minutes tutorial and we use motion tweening to show the network level. We will use 10 frames which will show the network strength using the motion tweening, then we'll have to add the 11th frame which will run if no network if found.

Important: First Setup Your Flash Professional 8 by clicking here

Skill level : Basic.
Duration : 15 Minutes.

Flash Professional 8 Shortcuts

Q : Free Transform tool
R : Rectangle tool
T : Text tool
V : Selection tool
F5 : Insert Frame
F6 : Insert KeyFrame
F9 : Action Frame
ctrl+i : Align & Info & Transform Frame
ctrl+F3 : Properties Frame


STEPS

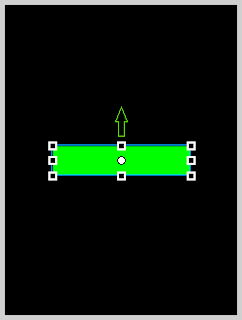
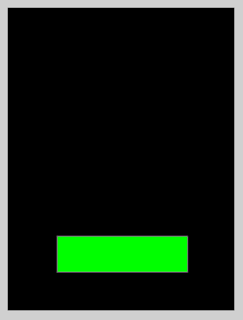
1.) On the layer 1 press R (Rectangle tool) on keyboard and make a small rectangle near the bottom of the screen representing the lowest level for the network. Image(1)

image (1)


Now press V (Selection tool) so that the rectangle tool turns to the selection tool.
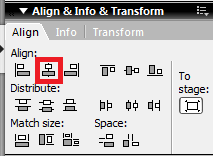
Double click the rectangle and press ctrl+i (Align & Info & Transform Frame), switch to the Align tab and click the icons as shown in the image (2).

image (2)


2.) Now on the timeline click on the 10th frame of layer 1 and press F5 (Insert Frame). Refer image (3 a) and (3 b).

Image (3 a)


Image (3 b)


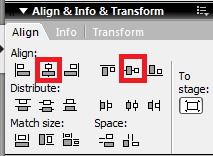
3.) Now right click on the 10th frame and select CREATE MOTION TWEEN. Now click and drag the rectangle and move it to the center of the screen. Or press ctrl+i (Align & Info & Transform Frame) and in the ALIGN tab click the icons as shown in image(4).

Image (4)


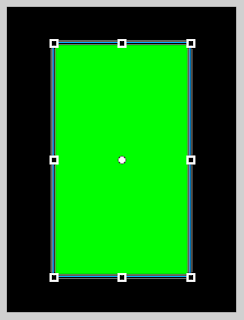
4.) Now press Q (Free Transform tool) and click and drag the edge as shown in image (5 left) to get a bigger rectangle as shown in image (5 right), Then press Enter button on your keyboard to see the effect.

Image (5 left)
               
Image (5 right)


5.) Now right click on the 11th frame and select INSERT BLANK KEYFRAME Then press T and make a text box and write " No Signal ". Now press ctrl+F3 (Properties Frame) and change the color of the text as shown in the images (6 a) and (6 b). You can adjust the height and width of the text box by clicking and dragging the edges and then align it in the center.(refer to image (5)).

Image (6 a)


Image (6 b)


6.) Create a new layer by clicking on the icon as shown in the image(7).

Image (7)


7.) Rename this layer to " action ". Now double click on any frame and then right click and select CONVERT TO BLANK KEYFRAME. image (8).

Image (8)


8.) Now Select the first frame of action layer then press F9 (Action Frame) and paste the following code in the Actions - Frame.


levelsNumber=10;
signalMax = fscommand2("GetMaxSignalLevel");
signalLevel = Math.ceil(fscommand2("GetSignalLevel")*levelsNumber/signalMax);
networkstatus = fscommand2("GetNetworkStatus");

if (networkstatus == 0)
{ //If there is no network 
     signalLevel = levelsNumber + 1;  // screen will display NO SIGNAL(11th frame) 
}

gotoAndPlay(signalLevel);


9.) Now Paste this code on all other frames of action layer.(Paste this code from frame 2 to frame 11)


call(1);


10.) Save this movie and transfer it to your phone to see it in action.......

Click here to download the network_example.zip
Settings for FlashLite 1.1 in Flash Professional 8

Here is Setting to setup Flash Professional 8 before you make any flashlite movie...
This can be done in three easy steps...

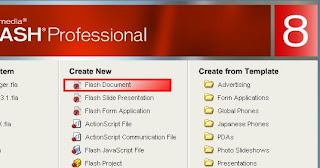
1) Create a new flash document.


2) Press ctrl+F3 to open the properties dialogue box.


Chose the screen size (240X320 for latest phones), than chose the background color (use black it will help you to save your battery).

3) Then the most important thing........ Click the publish button and click the flash tab and chose the version as flash lite 1.1 then click ok.


Now go to my other tutorials to start making your flashlite movies for your phone....

How to Play Mobile games on YOur PC

Hit Counter Hit Counter

Many of you may have asked this question on how to run java games and application on your pc....... Well heres your answer........ These are great tool to test the game/ Application before you upload them to your phone.

There are two tools with witch you can do that....

1) Sun Java Wireless Toolkit.

2) S60 3rd Edition SDK for Symbian S, Supporting Feature Pack 1, for MIDP

Sun Java Wireless Toolkit
The Sun Java Wireless Toolkit (formerly known as Java 2 Platform, Micro Edition (J2ME) Wireless Toolkit) is a state-of-the-art toolbox for developing wireless applications that are based on J2ME's Connected Limited Device Configuration (CLDC) and Mobile Information Device Profile (MIDP), and designed to run on cell phones, mainstream personal digital assistants, and other small mobile devices. The toolkit includes the emulation environments, performance optimization and tuning features, documentation, and examples that developers need to bring efficient and successful wireless applications to market quickly

Here are some of the screen shots of Sun Java Wireless Toolkit

Follow the Link to download Sun Java Wireless Toolkit.

This is a 38.3 Mb download.

But for Wireless Toolkit First the jar file has to be conver to jad format and both of them kept at the same location.

This is the screenshot of the Jar to jad converter......


Download Jar To Jad converter only 70 Kb.


S60 3rd Edition SDK for Symbian OS, Supporting Feature Pack 1, for MIDP

This is an emulator from nokia where you can test your java applicaitons and games. Almost all applications and games run on it , but the applications which requires to use the phones memory ( Not the RAM memory ) or card memory may not even install at all. This thing can run symbian applications also. As the name suggests it is made for the Symbian S60 3rd Edition OS. So it can run applications and games having .sis and .sisx extension.

Here are some of the screen shots of the Nokia SDK


Follow this link and download Nokia S60 3rd Edition, Feature Pack 2 SDK

From the download options.
This is a large 445 Mb download.
but you'll need to login to download this Application.

Here are some of the games which you can try it on the emulator and your mobile....

Just visit my gallery at mobile9

Click here to visit

some game screenshots


How to make analogue flashlite clock

Web Counter Web Counter

Important: First Setup Your Flash Professional 8 by clicking here

Change the resolution of your flash clock to match the phones resolution change the background color to balck if you like (I use balck as it is energy efficient, will be easy on your phones battery).

Here's an example of the flashlite clock we are going to make .....


Skill level : Basic.
Duration : 10-15 Minutes.


Flash Professional 8 Shortcuts

R : Rectangle tool
V : Selection tool
F5 : Insert Frame
F6 : Insert KeyFrame
F8 : Convert to Symbol
F9 : Action Frame
ctrl+i : Align & Info & Transform Frame
ctrl+F3 : Properties Frame

STEPS:

1.) Press R (Rectangle tool) on your keyboard and make three rectangular shaped hands as shown in the figure. Use the blue for Seconds hand, Red for the Minutes hand, Green for the Hours hand.

(image 1)


2.) Now double click the Green colored Hours hand and Press F8 (Convert to Symbol). Name it hours, choose type as Movie clip, the registration should be at the central bottom position as in image 2. Now repeat this process for the other two hands.

(image 2)


3.) Now select the Hours hand and Press ctrl+F3 (Properties Frame) to open the properties frame. Now give it a instance name (should be same as used in the coding) hour. And then select the Minutes hand and name it as min. Then select the Seconds hand and name it as sec.

(image 3)


4.) Now we will have to center the hands so that they rotate around their registration point. Make a small circle (we will use this circle as a reference point to position the Clocks hands.) , double click to select the circle , Now press ctrl+i (Align & Info & Transform Frame), click the align tab and click as shown in the picture. You can now use this circle as a reference point.

(image 4)


5.) Now select the Hour hand and then press ctrl-x to cut it then paste it by pressing ctrl-v. Now place the Hour hand at the center so that the registration point coincides with the REFERECNE CENTER. Now Repeat this process with the Minutes hand and then with the Seconds hand.

The reason behind doing this is that we want

a)The Hours hand placed behind the other two hands.
b)The Minutes hand placed behind the Seconds hand but above the Hours hand.
c)The Seconds hand at the top of other two hands.

6.) Now click on the blank space and then Press F9 (Action Frame) to open the Action-frame and paste the following code.

hours=fscommand2("GetTimeHours");
minutes=fscommand2("GetTimeMinutes");
seconds=fscommand2("GetTimeSeconds");

sec._rotation=seconds*6;
min._rotation=minutes*6;
hour._rotation=hours*30;

EXPLANATION


_rotation is used to rotate the hands.
The Seconds and the Minutes hand have to complete 60 units( seconds and minutes ).
To complete their 60 units they will have to rotate a complete 360 degrees.
So 360/60 equals to 6 degrees. So 6 is multiplied to the seconds and minutes.
For the Hours Hand it has to complete 12 units(hours)
So 360/12 equals to 30 degrees. So 30 is multiplied to the hour.

7.) Important: Now go to the timeline and select the first frame and press F5 (Insert Frame) key to insert a frame.
As the clock will be static for a single frame.
To make it animated we insert a new frame in the timeline.

(image 5)

8.) Save this movie and transfer it to your phone to see it in action.......

Click here to download the analogue_clock.zip